
 0
0

Introduction
Functional enclosures serve a purpose beyond housing a product. They protect internal parts, manage heat and airflow, support mounting features, and in many cases carry the first impression of a product to its end user.
Getting the enclosure right — in terms of fit, function, and appearance — often takes more than one iteration. FDM 3D printing services have become a practical choice for this process because they allow enclosures to be produced, tested, and revised without the lead times and costs associated with traditional tooling.
This blog explains why FDM 3D printing is widely used for functional enclosures and what decisions matter when using it for this application.
What Makes an Enclosure Functional
Not every printed box qualifies as a functional enclosure. A functional enclosure is one that performs under real use conditions — it holds its shape, protects its contents, accommodates assembly hardware, and meets basic requirements of the environment it operates in.
For an enclosure to be considered functional, it typically needs to address the following:
Dimensional accuracy for part fitment and assembly
Wall strength to resist handling, impact, or mounting loads
Provisions for fasteners, cable entries, or ventilation
Surface condition appropriate for the end use or presentation
Material properties suited to the operating environment
FDM 3D printing addresses each of these when the part is designed and processed correctly.
Where FDM Fits in Enclosure Development
Enclosure development moves through stages. Early concepts need to be physically verified. Functional prototypes need to be tested under real conditions. Low-volume production needs to be delivered without the overhead of injection moulding tooling.
FDM 3D printing services support all three stages without requiring a different manufacturing setup for each.
Development Stage | What FDM Supports |
Concept Verification | Fast physical model to check form and fit |
Functional Prototype | Printed in engineering-grade material for real use testing |
Low-Volume Production | Consistent parts produced in small quantities without tooling |
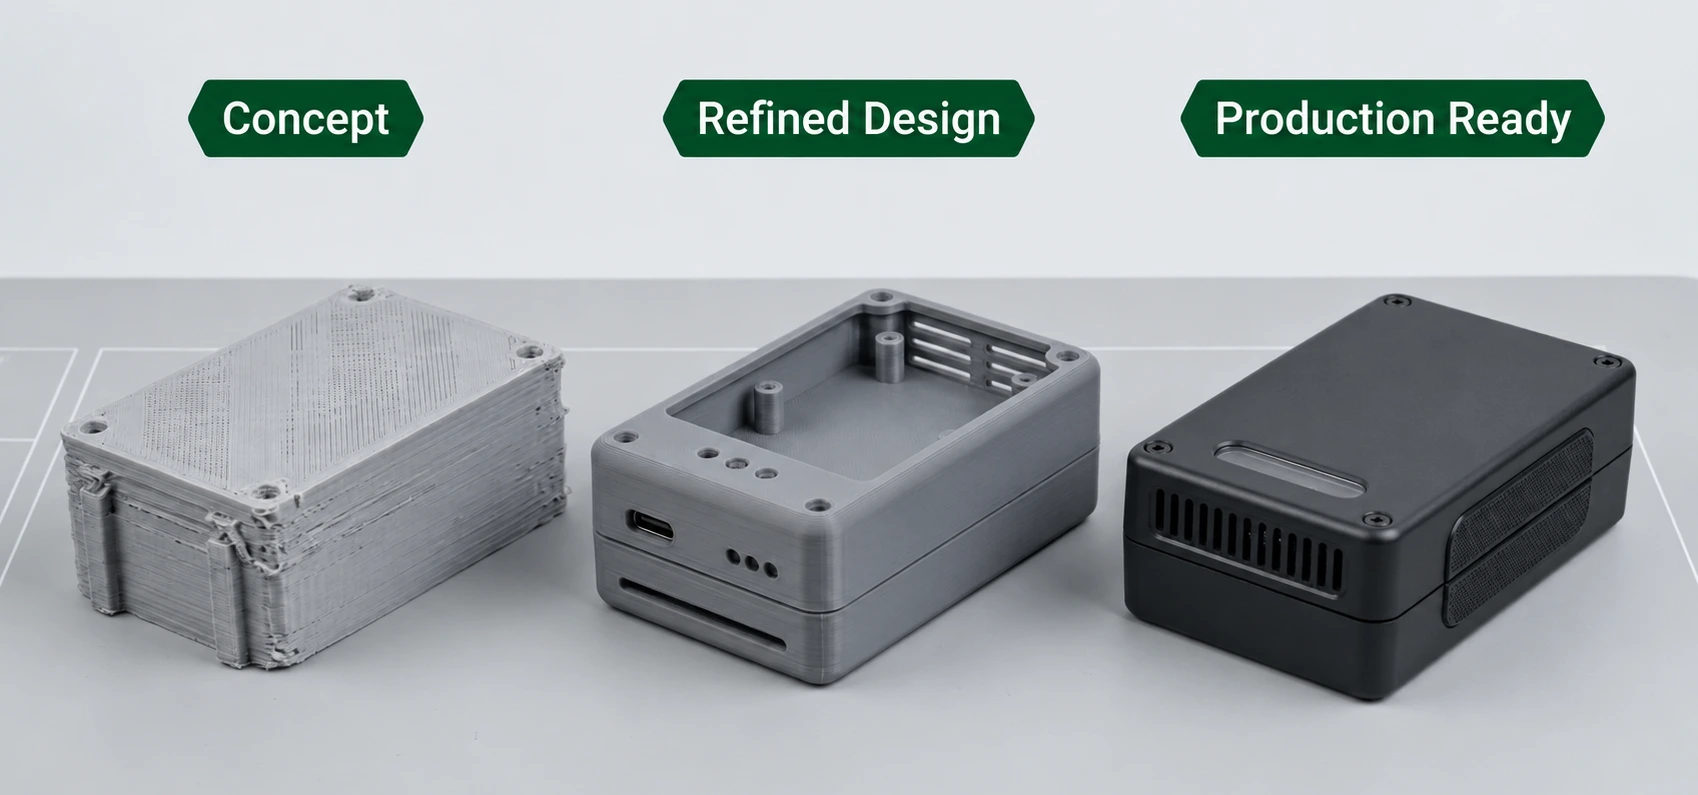
This continuity across stages is one of the practical reasons product teams use FDM 3D printing for enclosure development rather than switching between processes at each stage.
Design Flexibility Without Tooling
Injection moulding requires a tool to be cut before a single part can be produced. Any design change after the tool is made carries a cost and lead time implication. FDM 3D printing removes this constraint entirely.
An enclosure design can be revised between prints at no additional tooling cost. This makes it practical to:
Test multiple lid or base configurations in parallel
Revise internal bosses or standoff positions after a fitment check
Add or relocate cable entry points without any tooling change
Iterate on snap fit or fastener features until they perform correctly
For product teams working through the design phase, this flexibility directly reduces the cost and time of getting an enclosure to a production-ready state.
Material Options for Functional Requirements
FDM 3D printing supports a range of materials, each suited to different functional requirements. Selecting the right material for the enclosure application is as important as the design itself.
Material | Relevant Properties | Suitable For |
PLA | Good rigidity, easy to print | Concept models, display enclosures |
ABS | Impact resistance, moderate heat tolerance | Functional prototypes, general enclosures |
ASA | UV and weather resistance | Outdoor or exposed enclosures |
PETG | Good chemical resistance, toughness | Enclosures near fluids or chemicals |
PC (Polycarbonate) | High impact and heat resistance | Industrial or high-load enclosures |
TPU | Flexible, impact absorbing | Soft-touch covers, protective housings |
Nylon (PA) | High strength, good fatigue resistance | Structural enclosures, load-bearing parts |
Material selection should be based on the operating environment, mechanical load, and surface finish requirement of the enclosure — not on print ease alone.
Wall Thickness, Infill, and Structural Integrity
Two decisions that directly affect how a functional enclosure performs in FDM are wall thickness and infill density. These are not aesthetic choices — they determine whether the enclosure holds up under real use conditions.
Wall Thickness Thin walls reduce print time and material but compromise strength. For functional enclosures, walls need to be thick enough to resist the loads imposed during assembly, handling, and operation. The right wall thickness depends on the material, the load type, and the enclosure geometry.
Infill Density Infill refers to the internal structure printed inside solid-looking walls. Higher infill increases rigidity and load capacity. Lower infill reduces weight and print time. For enclosures that carry mounting hardware or are handled frequently, infill should be selected with structural performance in mind rather than defaulting to a standard setting.
Perimeter Count In addition to infill, the number of outer perimeters printed around the walls affects surface strength and screw-pull resistance. Enclosures with threaded inserts or self-tapping screws benefit from a higher perimeter count in those zones.
Surface Finish and Post-Processing
FDM parts have visible layer lines by default. For functional enclosures, the acceptable surface condition depends on the end use.
For internal or technical use, layer lines are generally acceptable and no post-processing is required. For customer-facing or presentation enclosures, post-processing options improve the surface significantly.
Common post-processing options for FDM enclosures:
Sanding — reduces layer line visibility, improves paint adhesion
Priming and painting — provides a uniform, finished surface suitable for branding or colour requirements
Acetone vapour smoothing — applicable to ABS, produces a smoother surface without manual sanding
UV printing — applies graphics, labels, or branding directly onto the enclosure surface
Post-processing decisions should be made during the design stage, not after the part is printed, as they affect wall thickness tolerances and feature dimensions.
From Prototype to Low-Volume Production
One of the practical advantages of FDM 3D printing services for enclosures is the ability to move from a prototype to a small production quantity without changing the manufacturing process.
When a design is verified and stable, the same FDM setup used for prototyping can produce a controlled quantity of identical parts. This is useful for:
Pilot production runs before committing to injection moulding
Low-volume products where tooling investment is not justified
Products with multiple variants where each variant is produced in small numbers
Replacement parts for existing products where original tooling no longer exists
This does not mean FDM is always the right production process at scale. But for quantities where tooling cost per unit is high, FDM 3D printing services offer a practical and cost-effective path.
When FDM Is the Right Choice
FDM 3D printing is not the right choice for every enclosure requirement. Understanding where it fits helps in making a better decision.
FDM is well suited when:
The design is still being iterated and tooling commitment is premature
Quantities are low and tooling cost per unit is difficult to justify
The enclosure has complex internal geometry that would require expensive tooling features
Material and strength requirements fall within what FDM-grade materials can support
Lead time is a constraint and traditional manufacturing cannot meet the timeline
FDM is less suited when:
Surface finish requirements are beyond what post-processing can achieve
Very high volumes make per-unit material and print time costs inefficient
The enclosure requires material properties outside the range of available FDM filaments
Dimensional tolerances are tighter than FDM can consistently deliver
Takeaways
FDM 3D printing services are widely used for functional enclosures because they support the full development cycle, from early concept to low-volume production, without the constraints of tooling. The ability to revise a design between prints, select materials based on functional requirements, and control structural parameters like wall thickness and infill makes FDM a practical and reliable choice for enclosure development.
The key to getting a functional enclosure right with FDM is treating the process decisions (material, wall thickness, infill, and post-processing) as part of the design itself, not as settings applied after the fact.
For enclosure requirements that need to be produced, tested, and refined quickly, FDM 3D printing offers a direct path from drawing to functional parts.
Get an Instant Quote for your FDM 3D printed enclosure with Mech Power.
FAQS
Frequently Asked Questions
Yes, for low to medium volume requirements where tooling is not practical, FDM printed enclosures are used as final production parts.
Yes, when printed in ASA or UV-resistant materials, FDM enclosures can be used in outdoor or exposed environments.
Yes. Heat-set threaded inserts can be pressed into FDM parts after printing to provide reliable, reusable threads for assembly hardware.
Lead time depends on part size, complexity, and quantity. FDM is generally faster than tooling processes, making it suitable for time-sensitive development cycles.
Yes. FDM parts can be sanded, primed, painted, or UV printed to meet surface finish and branding requirements.